一. Operation procedure
1. Turn on the external power switch, open the cooling water, check for any blockage or leakage in the cooling water, and ensure that there is a certain flow of water coming out of the outlet pipe.
2. Turn on the air switch and main power switch on the back panel of the high frequency machine.
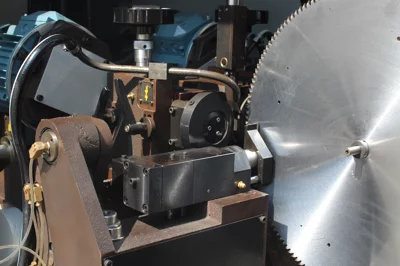
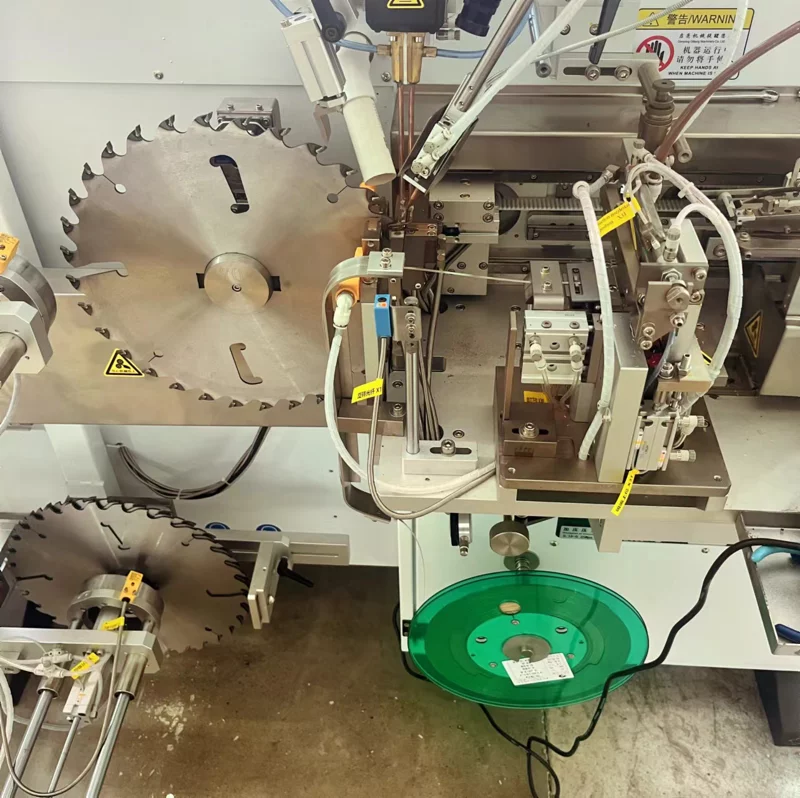
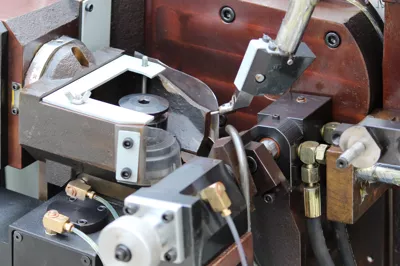
3. Choose the appropriate core sleeve, hang the shaft stop ring, hang the saw blade on the shaft stop ring, adjust the saw blade, clamp the differential head, alloy, induction coil head, infrared detector, and automatic welding device position.
4. Select the appropriate welding piece according to the size of the alloy and the thickness of the saw blade, apply welding paste to the welding piece and place it on the top of the alloy.
5. Open air valve 1 (release the clamping component cylinder), close air valve 2 (push the saw blade to the front limit), close air valve 1 (clamp the saw blade with the clamping component cylinder), and do not move the fixture of the alloy component to the rear limit temporarily.
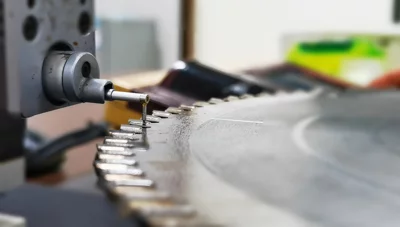
6. Place the alloys in the two alloy clamp grooves in the welding direction.
7. Use tweezers to push one alloy onto the bracket, press down on the pneumatic finger switch II with your foot, release the pneumatic finger, move the clamping handle to the right to clamp the alloy, push the handle to the left to position the alloy under the welding tooth about 1/2 of the length of the alloy, ensuring the surface of the alloy is flush with the welding tooth.
8. Hold the saw blade with your left hand, press the high-frequency welding foot switch to start heating, when the preset temperature is reached, the automatic welding device will start welding automatically, and retract after the preset time. Push the clamping handle of the alloy forward to the root of the saw teeth with your right hand, and slightly press the saw blade with your left hand to ensure the welding piece is completely melted.
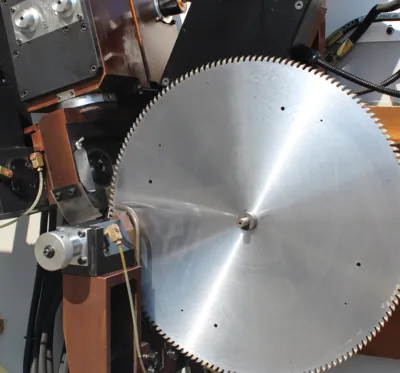
9. After welding each tooth, rotate the saw blade by hand and change the welding tooth. To prevent stress concentration during welding, for saw blades with dense teeth, a certain number of teeth should be skipped according to the actual situation.
10. Repeat steps 8-10 until all the teeth are welded. Open air valve 1 (release the clamping component cylinder), open air valve 2 (push the saw blade back to the rear limit), remove the saw blade. Check if the alloy is welded properly and if there are any missed welds, if there are no issues, repeat the above steps to weld the next saw tooth.
二. Process requirements, quality control requirements
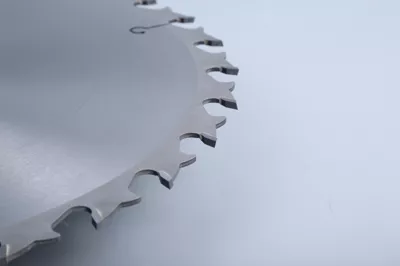
1. Welding must be complete without any missed welds.
2. Welding front angle tolerance: ±1°, welding left and right symmetry tolerance: ±0.05mm.
3. Welding should be done at intervals to prevent local overheating and cracking of teeth.

三. Maintenance precautions
1. Clean the equipment before and after work.
2. Drain the air three-way joints, and replenish pneumatic oil if insufficient lubricant is present.
3. Grease the lifting mechanism and press out the waste oil with fresh oil.
4. Apply anti-rust oil to the other feeding mechanisms and handles for protection.
5. Apply anti-rust oil to unused core sleeves for storage.
With years of hands-on experience, I have honed my skills in navigating the complexities of global commerce, offering invaluable insights and solutions to address customer needs. My commitment to excellence and dedication to customer satisfaction ensure that I deliver exceptional service, guiding clients through every step of the trading process with confidence and proficiency.
Related Topics:
manual gear hobbing machineYou may also like
Related News


Latest Update
Hard alloy saw blade series - Part Seven
Aug 01, 2024
Hard alloy saw blade series five
Jul 18, 2024